Plugin Installation
1. Plugin Overview
2. Requirements
To use the Toast plugin, make sure your server meets the following requirements:
- WordPress Version: 5.5 or higher
- PHP Version: 7.4 or higher
3. Installation
Method 1: Install from the WordPress Plugin Directory
- Log in to your WordPress Admin Dashboard.
- Navigate to Plugins → Add New.
- Search for Toast.
- Click Install Now.
- After installation, click Activate.
API Settings
Step 1: Configure API Settings
After activating the plugin, configure the API settings to enable communication with the Toast platform.
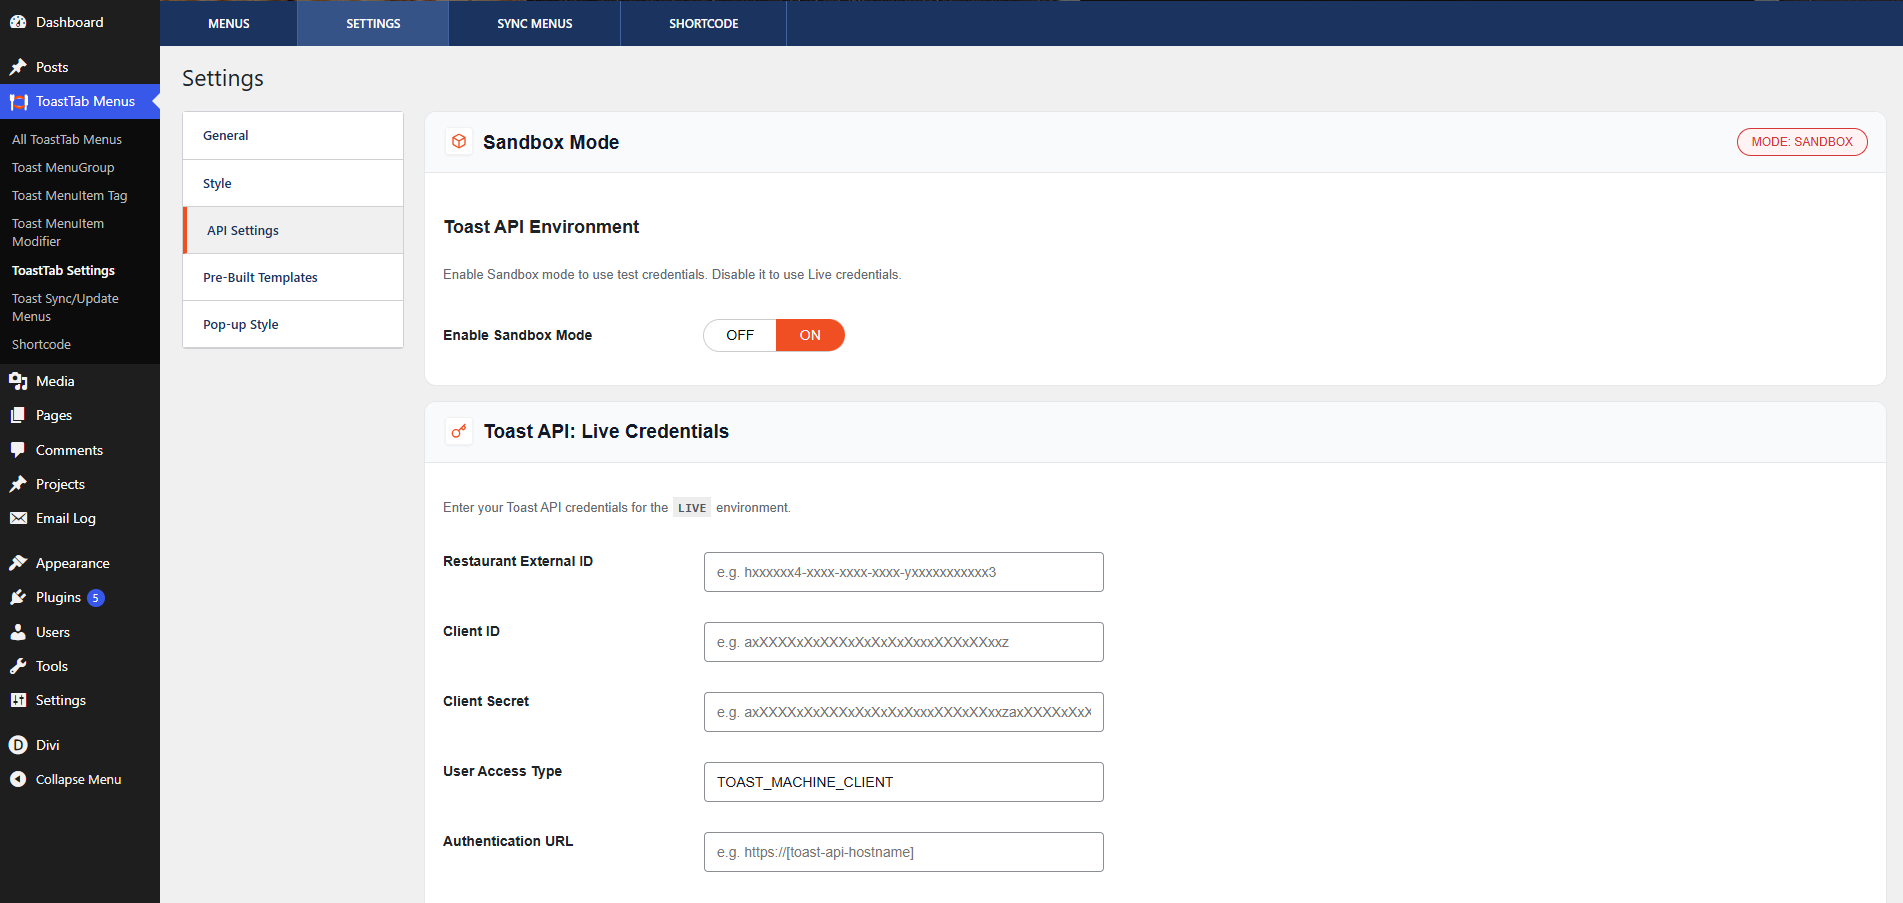
- Navigate to ToastTab Menu Dashboard → Settings → API Settings.
- In the Sandbox Mode section, select the appropriate environment:
- ON – Use Sandbox credentials for testing.
- OFF – Use Live credentials for production.
- If Sandbox Mode is disabled, enter the following details under Toast API Live Credentials:
- Restaurant External ID
- Client ID
- Client Secret
- User Access Type
- Authentication URL
- Click Test Live API Credentials to verify the connection.
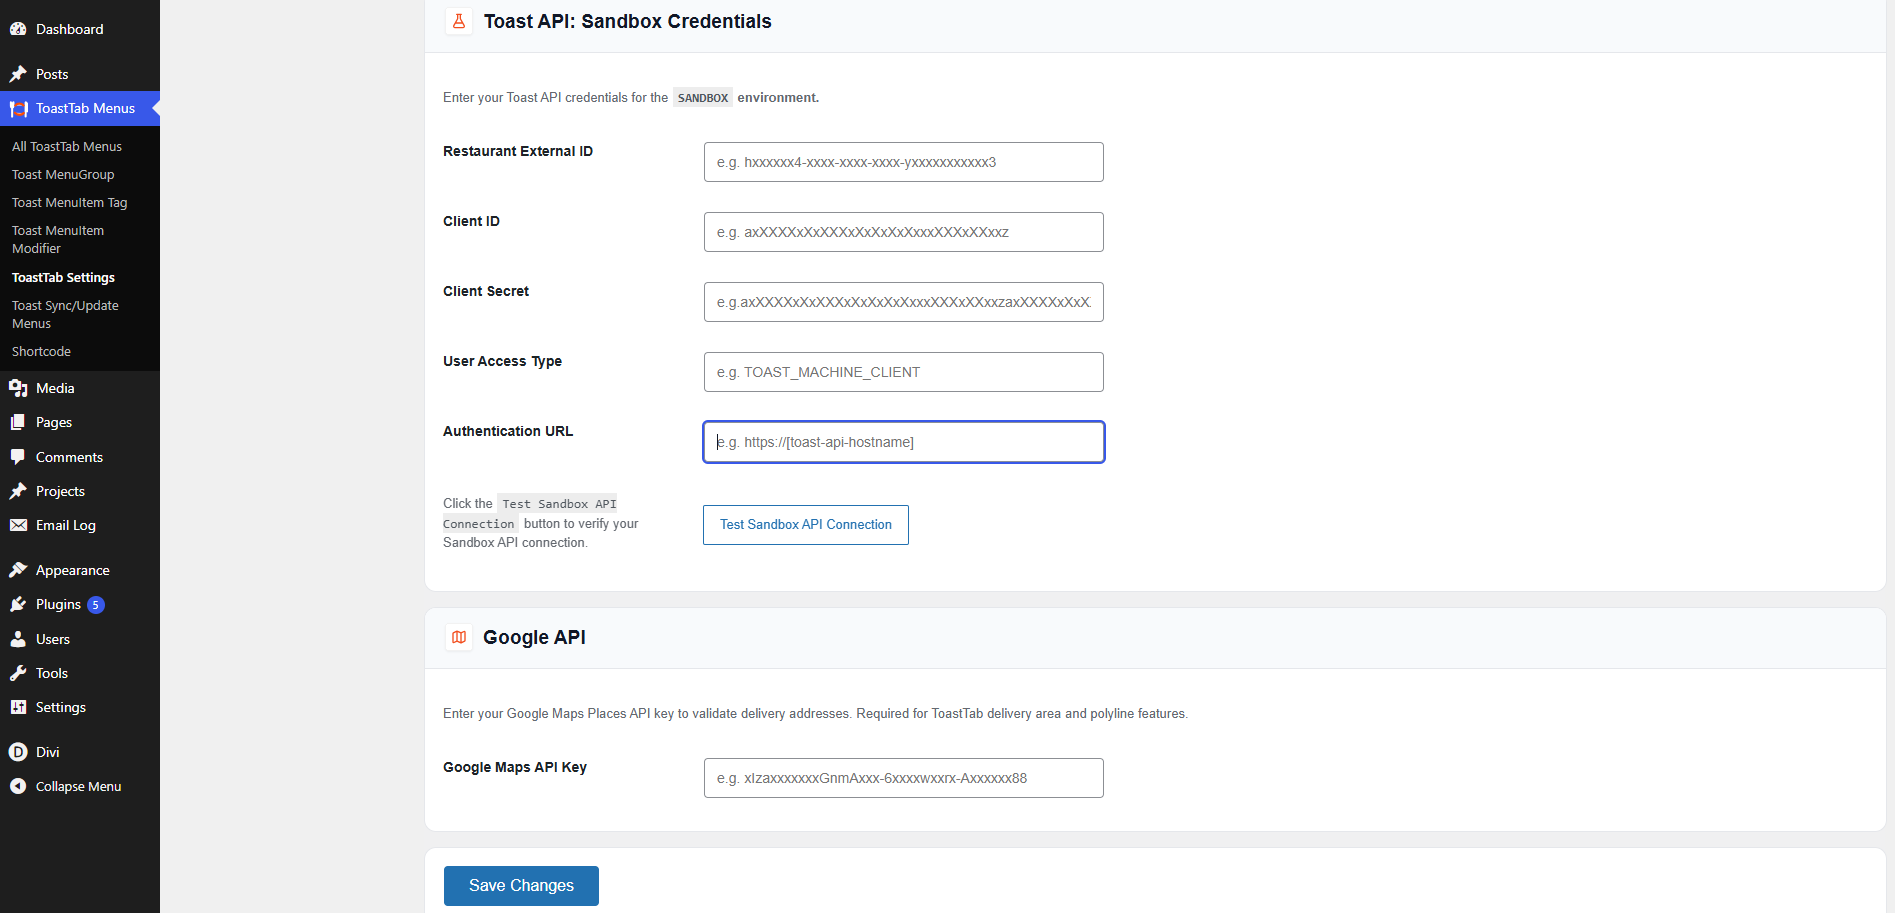
- If Sandbox Mode is enabled, enter the same details under Toast API Sandbox Credentials and click Test Sandbox API Credentials to verify.
- Click Save Changes to store the configuration.
Step 2: Sync Menus
After saving the API settings, you need to synchronize your menu data from Toast POS.
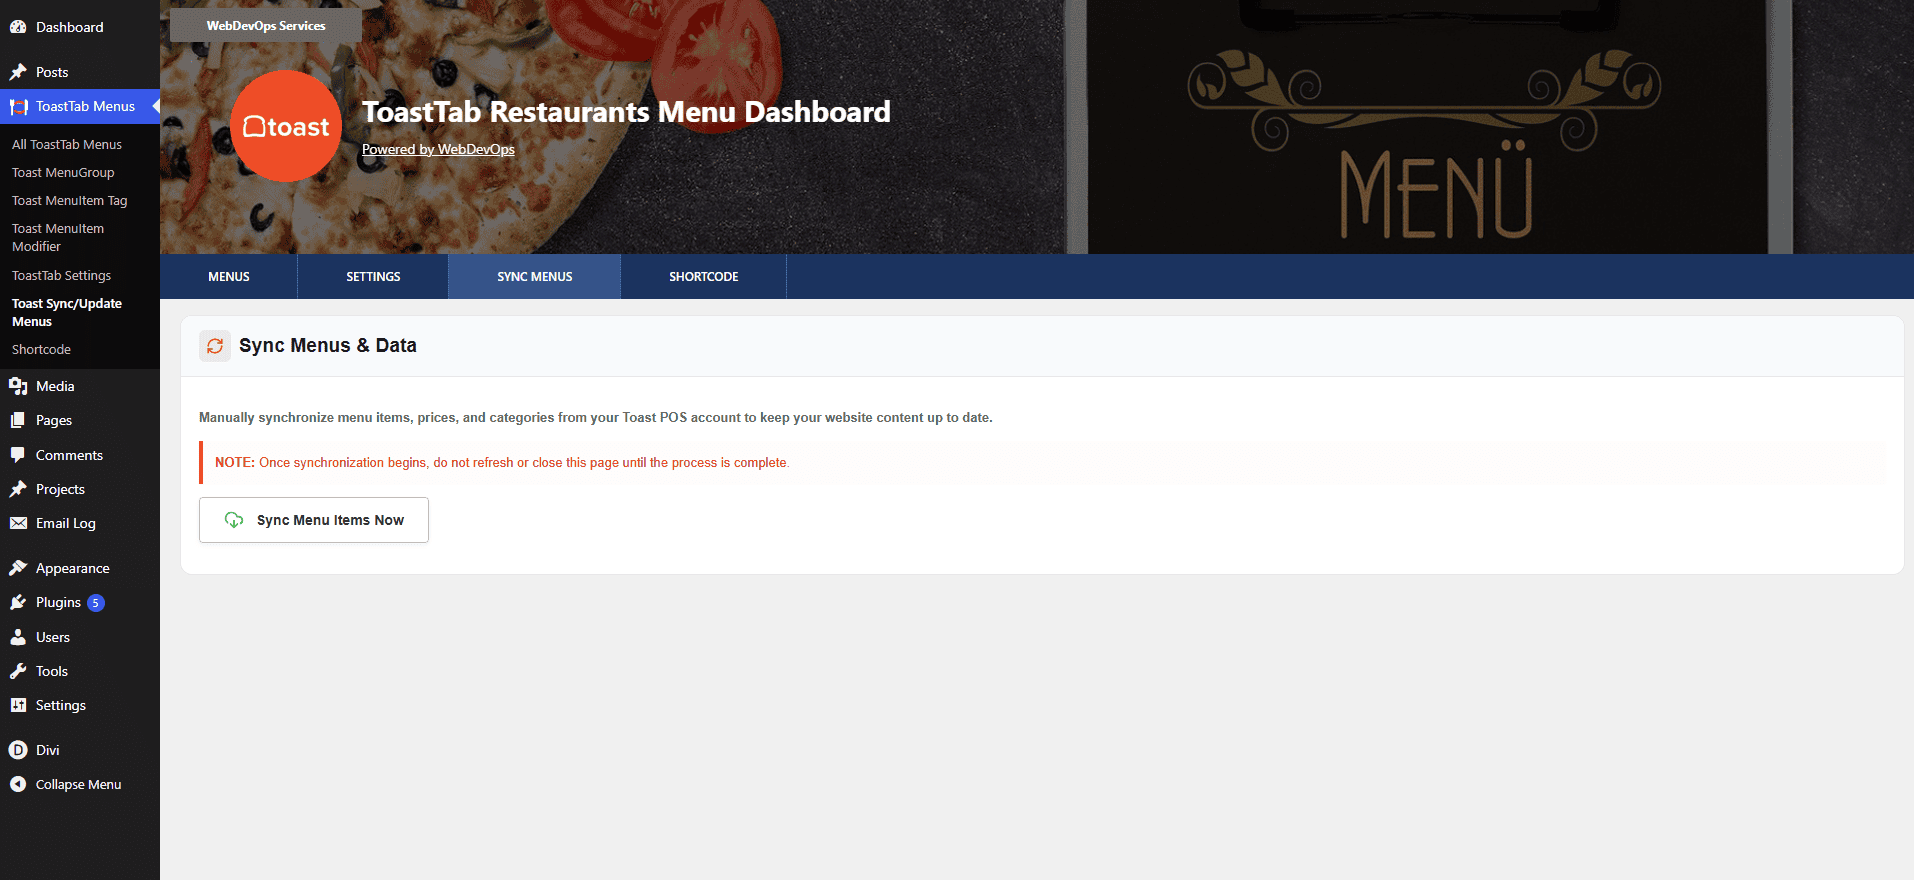
- Go to the Sync Menus tab.
- Click on Start Menu Item Synchronization.
- Wait until the synchronization process is completed.
Step 3: Shortcode Integration
To display your Toast menu on any page or post, follow the steps below:
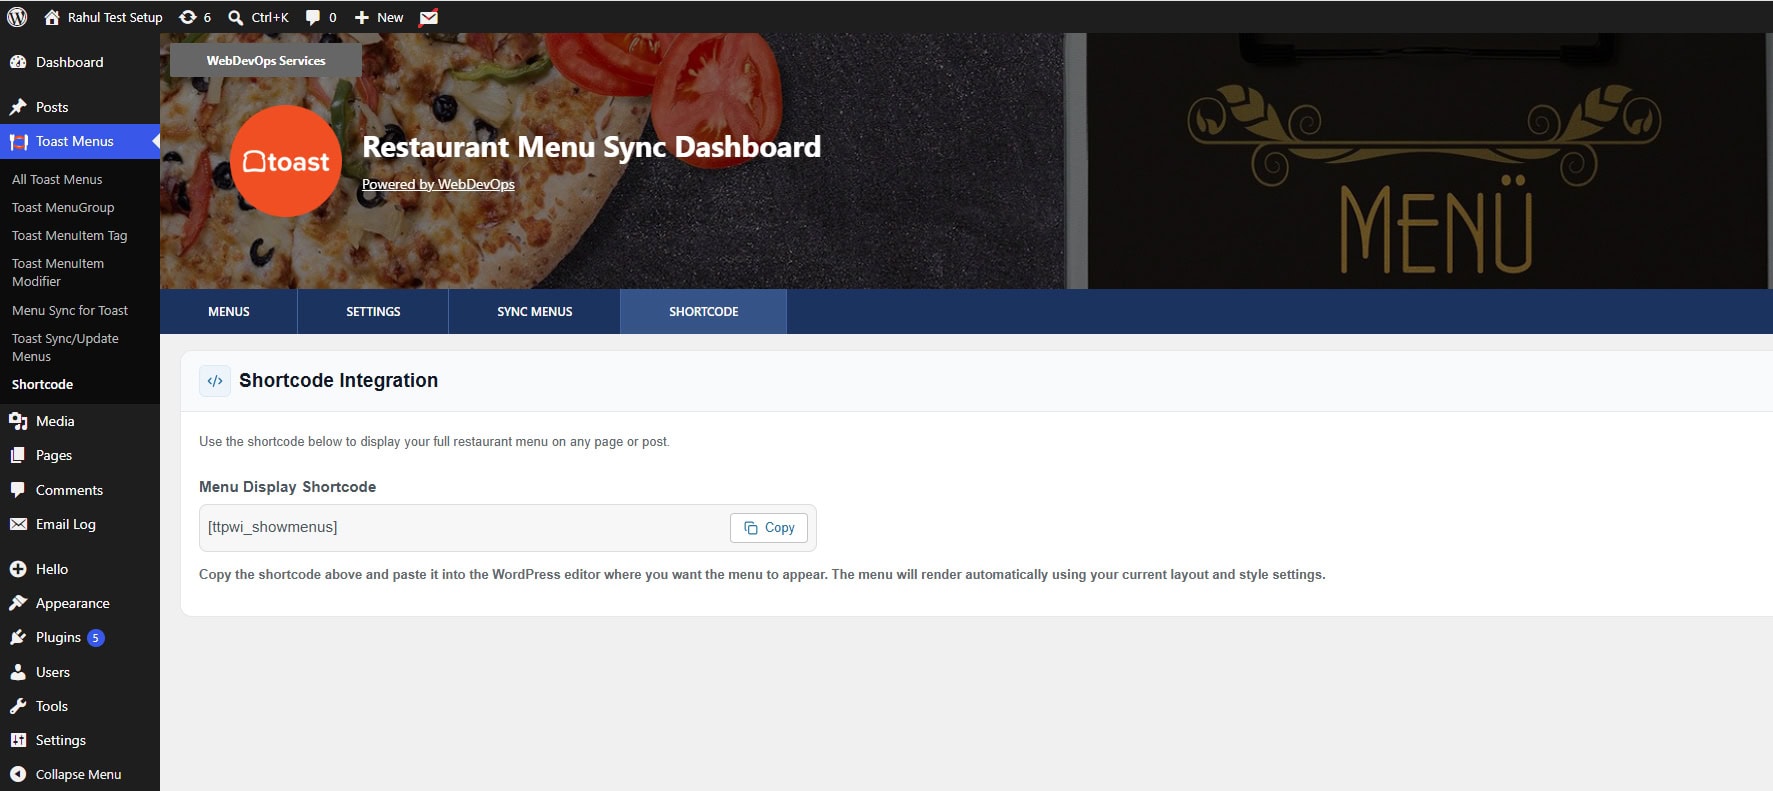
- Go to the Shortcode tab in the Toast plugin dashboard.
- Copy the provided menu shortcode.
- Open the page or post where you want to display the menu.
- Paste the shortcode into the WordPress editor.
- Save or Update the page.
Layout Settings
Configure General Settings
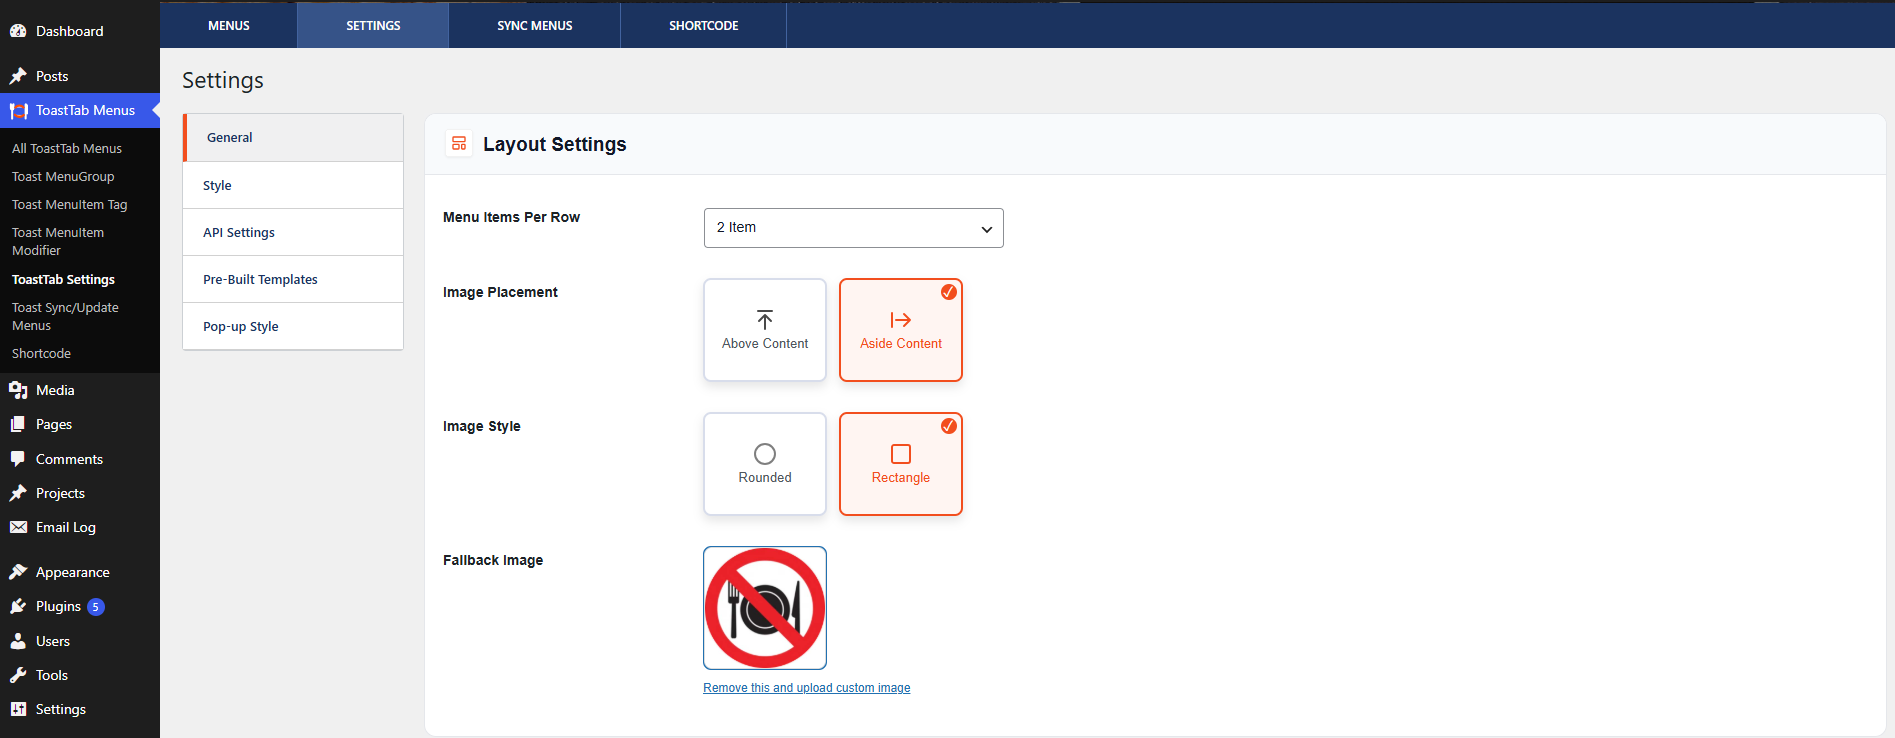
The General Settings section allows you to customize how menu items are displayed on the frontend.
Layout Options
- Navigate to ToastTab Menu Dashboard → Settings → General.
- Select the number of Menu Items Per Row from the dropdown list.
- Choose the Image Placement option:
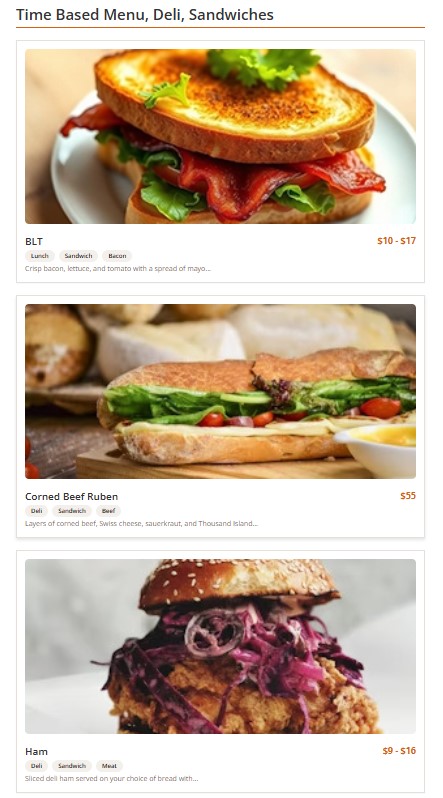
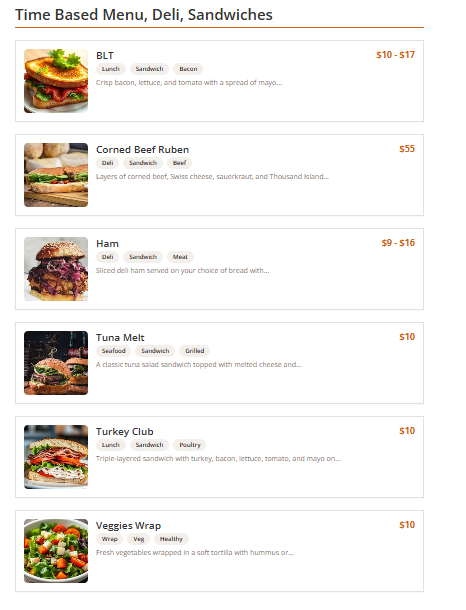
Select the Image Style:
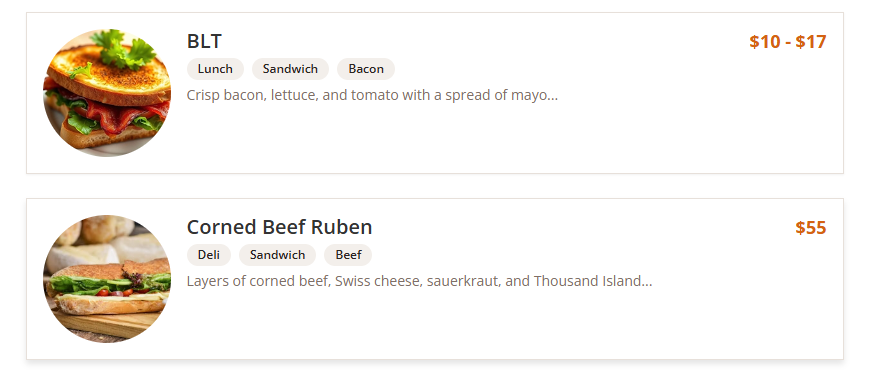
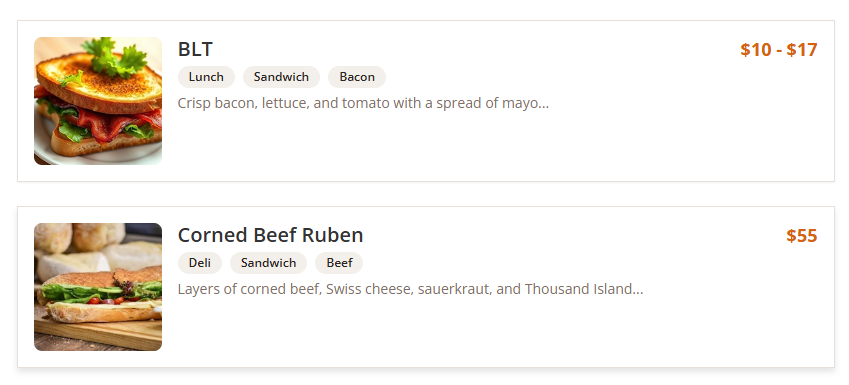
Upload a Fallback Image to display when a menu item does not have an image.

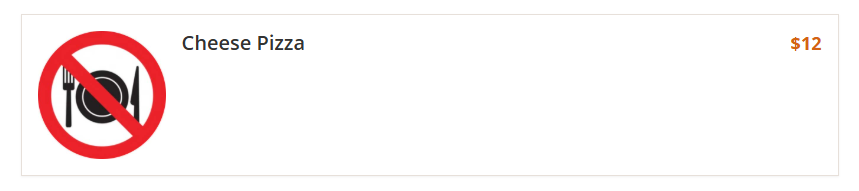
Visibility Settings
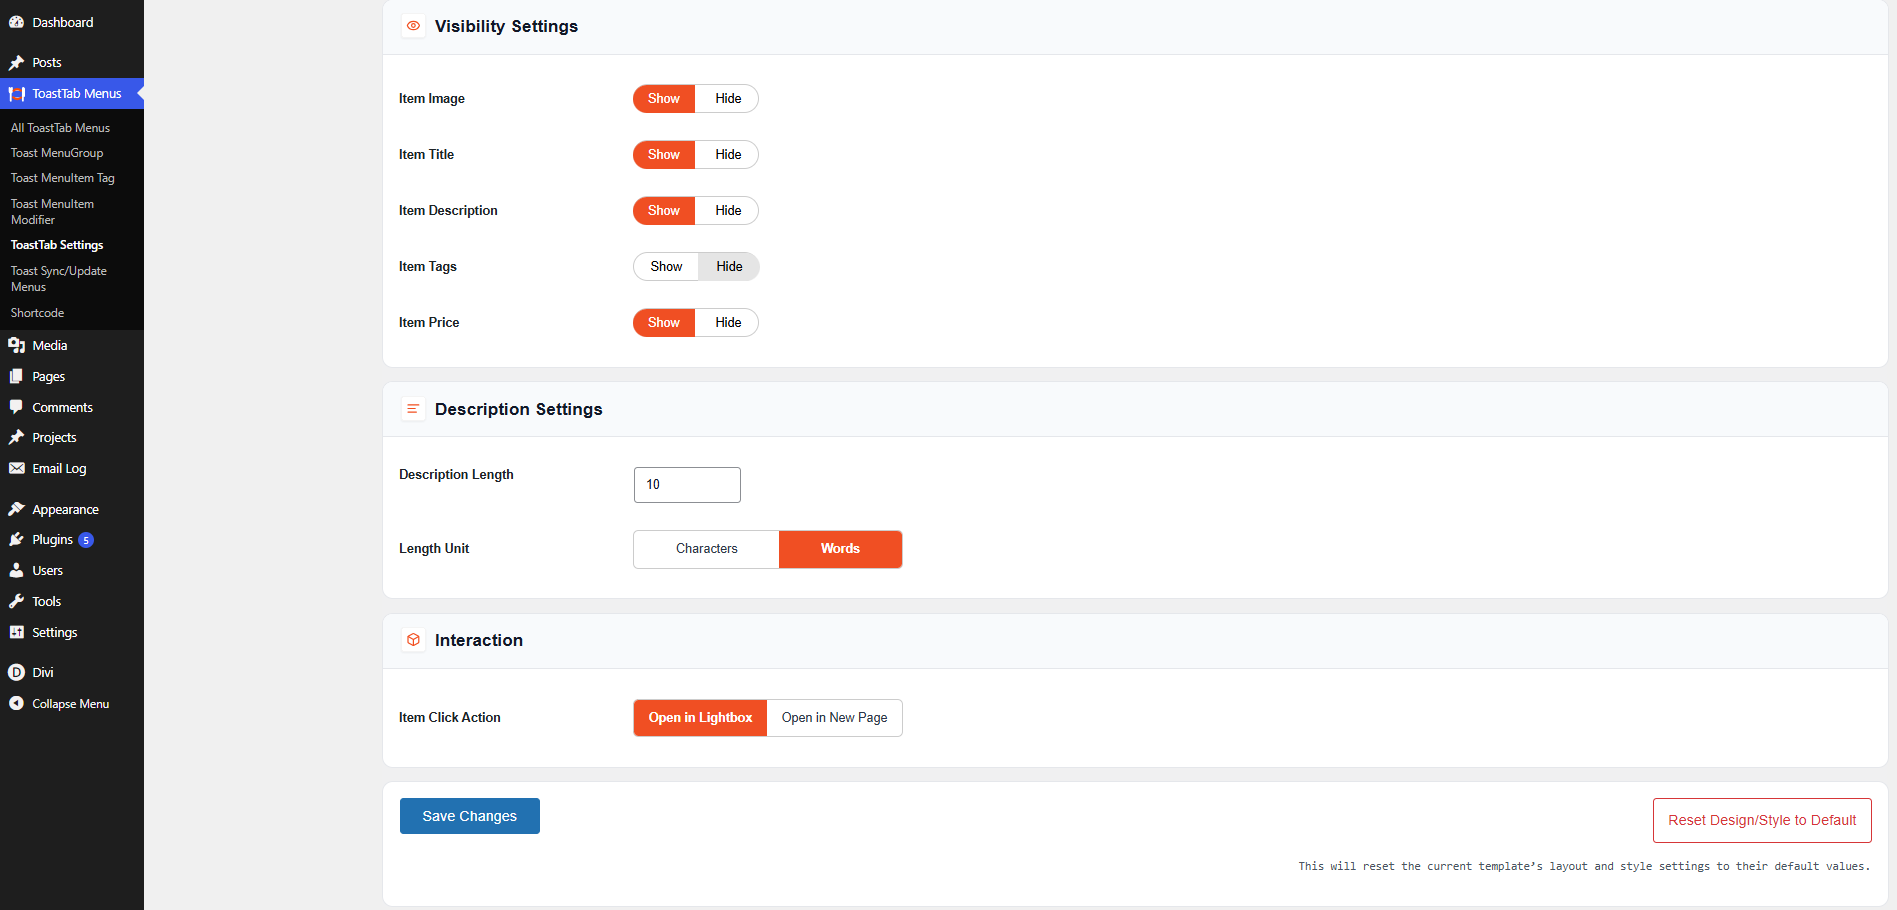
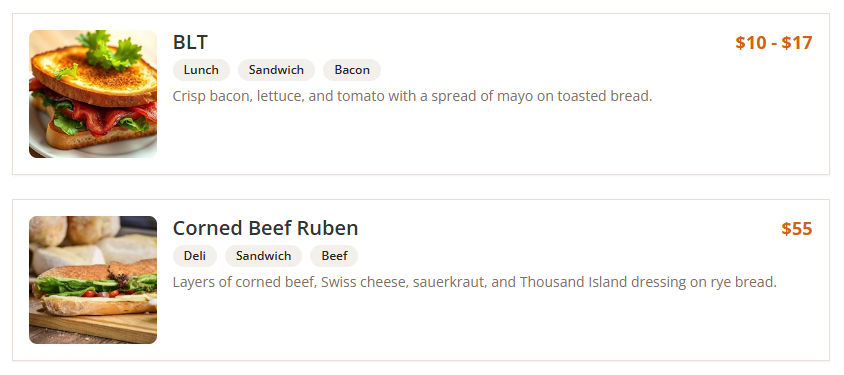
Configure which menu item details should be visible to visitors:
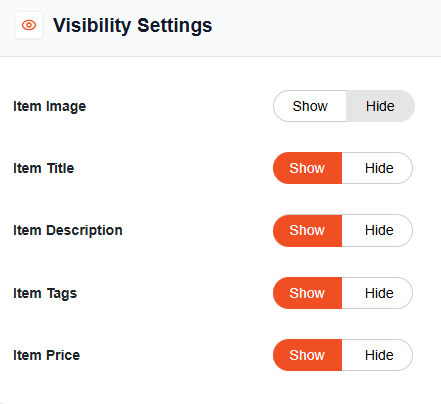
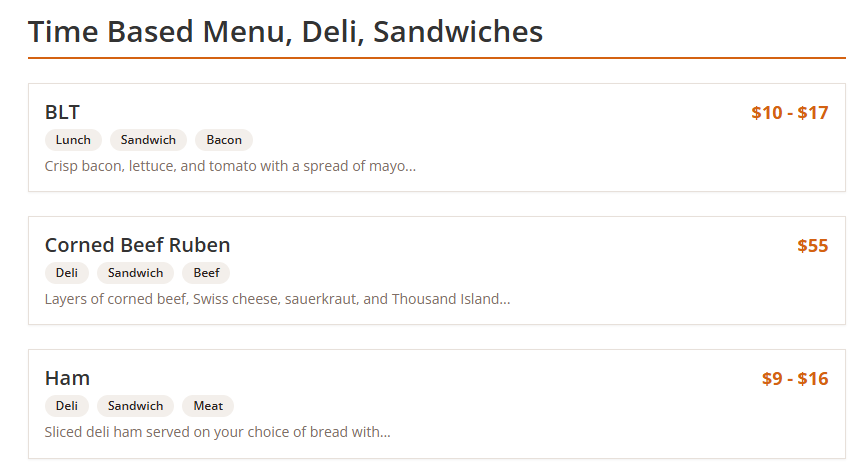
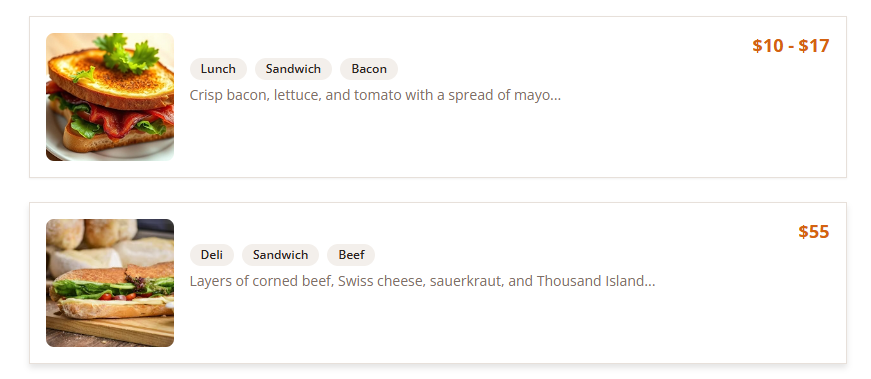
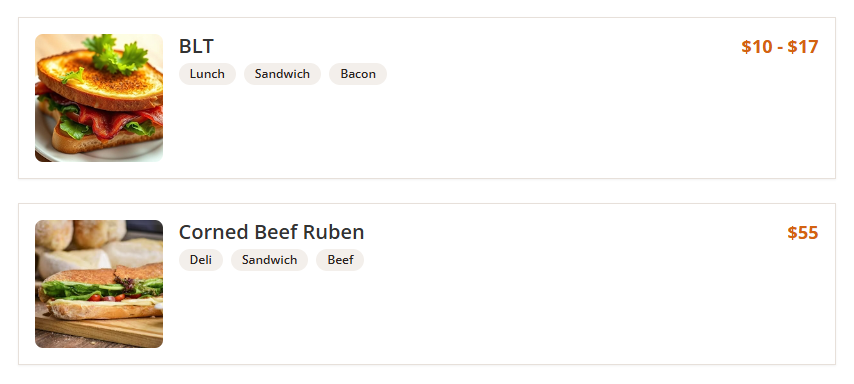
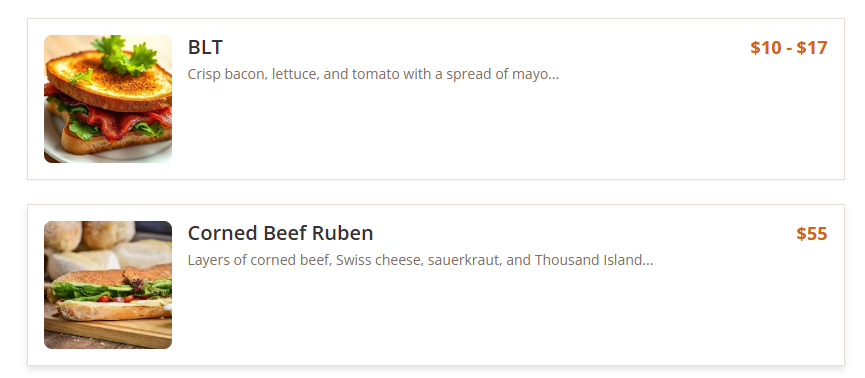
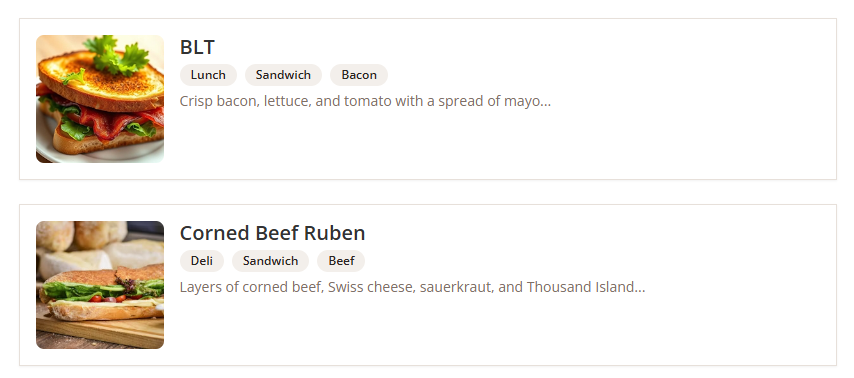
Use the Show or Hide toggle for each option.
Description Settings
Enter the desired Description Length. Select the length unit:

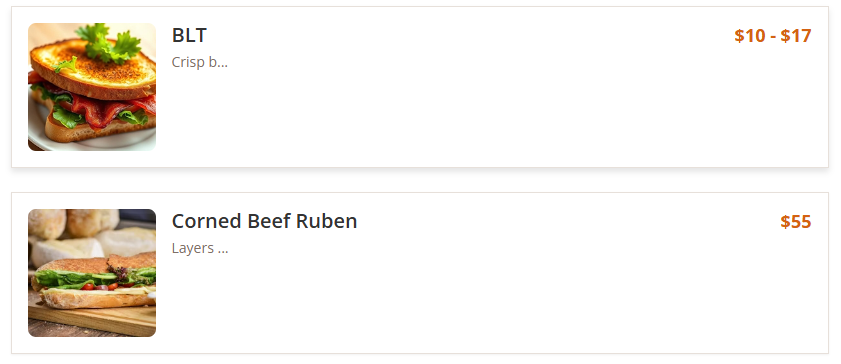

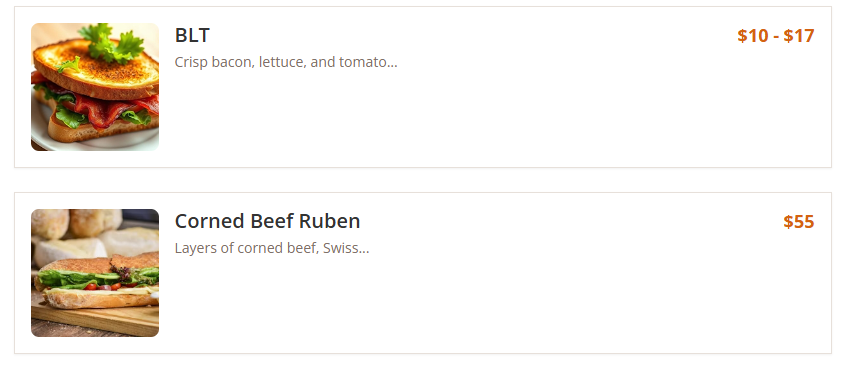
This setting controls how much of the menu item description is displayed.
Interaction Settings
Choose how users interact with menu items:
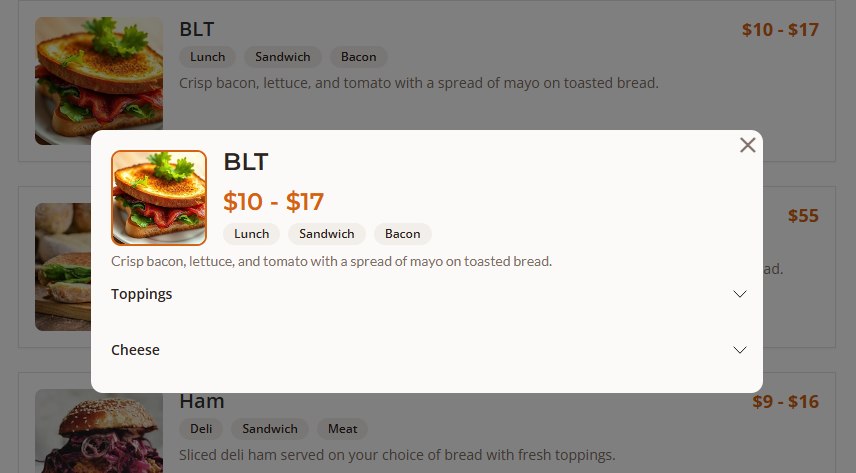
Save Settings
After configuring all options, click Save Changes to apply the settings.
Reset Design and Style Settings
If you want to restore all layout and style settings to their original default values, click Reset Design/Style to Default.
Style Settings
Configure Style Settings
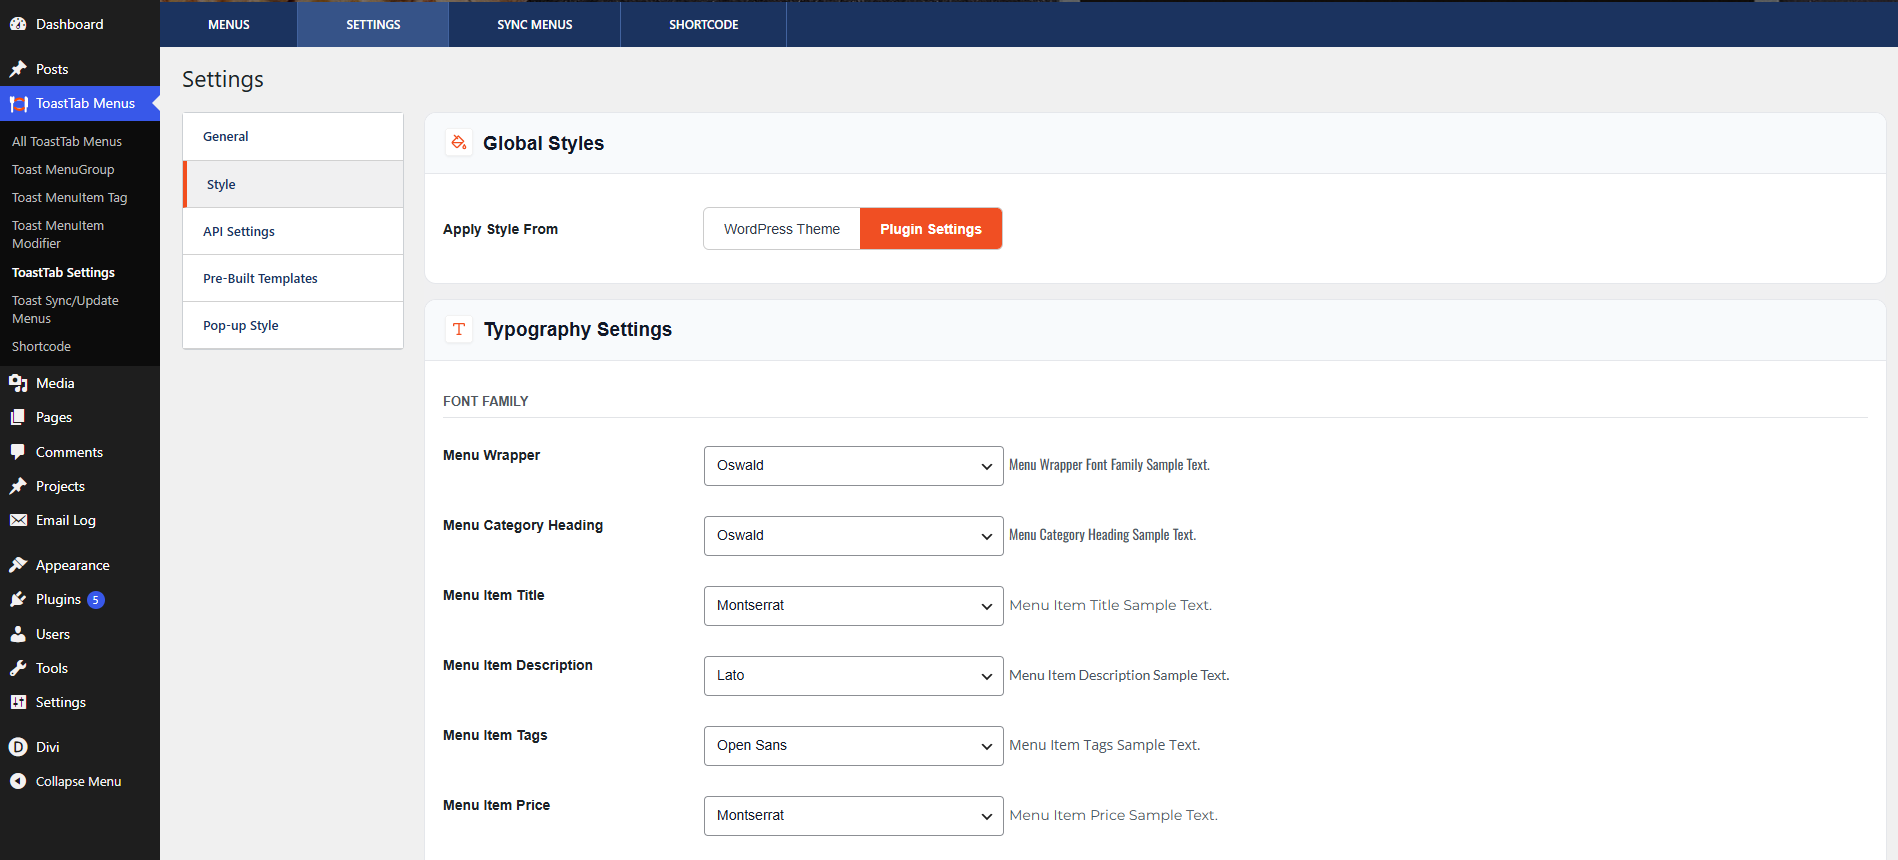
The Style Settings section allows you to customize the appearance of menu items displayed on your website.
Global Styles
Choose how the plugin styling should be applied:
- WordPress Theme – Uses the active theme's styling.
- Plugin Settings – Uses the custom styles configured within the plugin.
Typography Settings
Customize the fonts used for different menu elements. Configure font families for:
- Menu Wrapper
- Menu Category Heading
- Menu Item Title
- Menu Item Description
- Menu Item Tags
- Menu Item Price
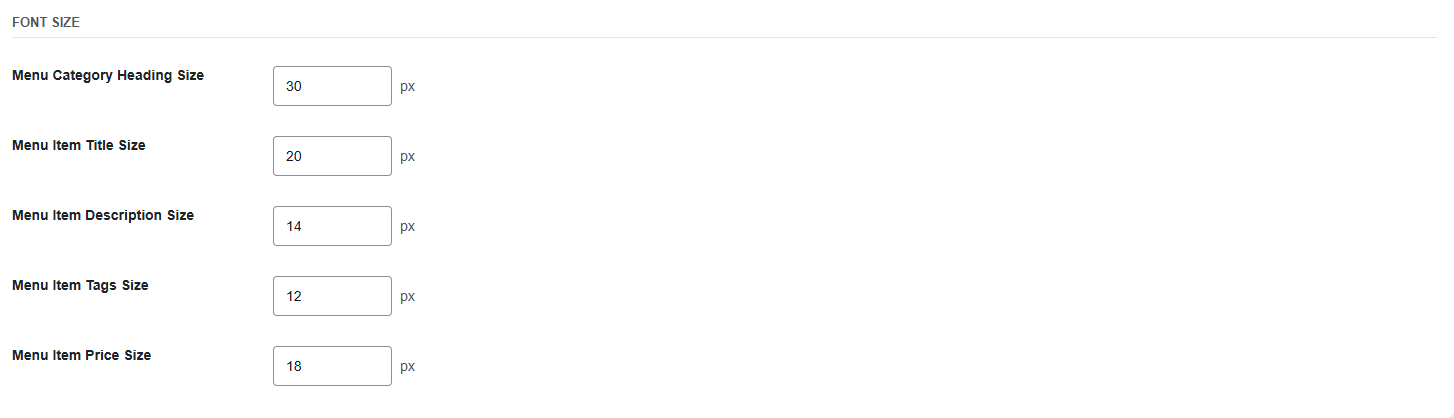
You can also specify font sizes (in pixels) for:
- Menu Category Heading Size
- Menu Item Title Size
- Menu Item Description Size
- Menu Item Tags Size
- Menu Item Price Size
Color Settings
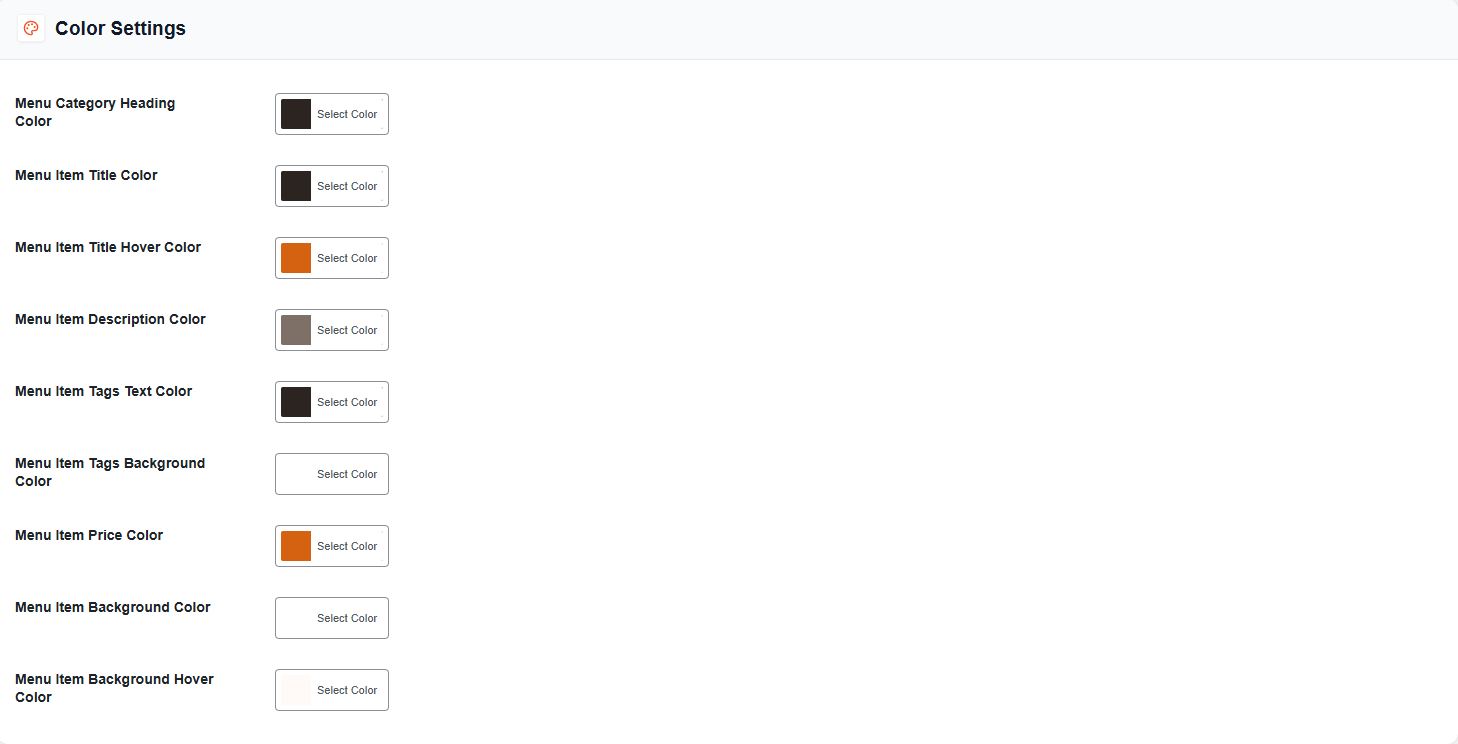
Customize the colors used throughout the menu display. Available color options include:
- Menu Category Heading Color
- Menu Item Title Color
- Menu Item Title Hover Color
- Menu Item Description Color
- Menu Item Tags Text Color
- Menu Item Tags Background Color
- Menu Item Price Color
- Menu Item Background Color
- Menu Item Background Hover Color
Use the color picker beside each option to select the desired color.
Edge Settings
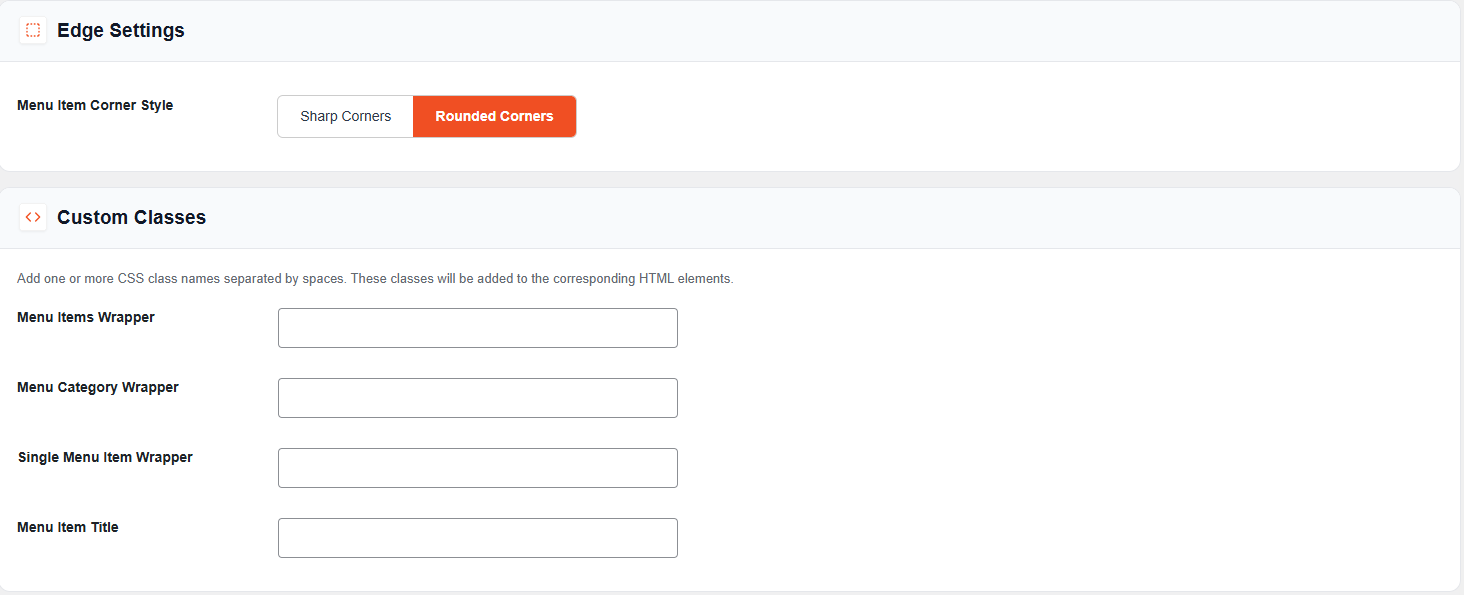
Select the corner style for menu items:
- Sharp Corners – Displays square corners.
- Rounded Corners – Displays rounded corners.
Save Settings
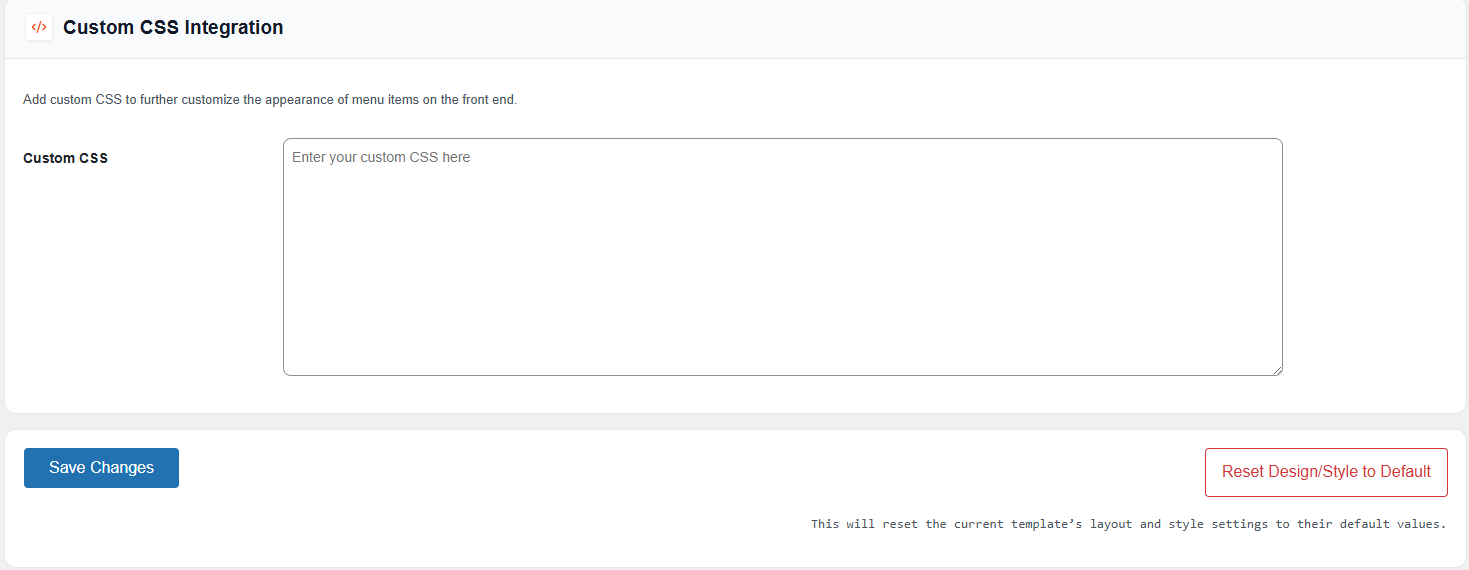
After making your changes, click Save Changes to apply the style configuration.
Reset Design and Style Settings
To restore all style and layout settings to their default values, click Reset Design/Style to Default.
Menu Templates Setting
Configure Pre-Built Templates
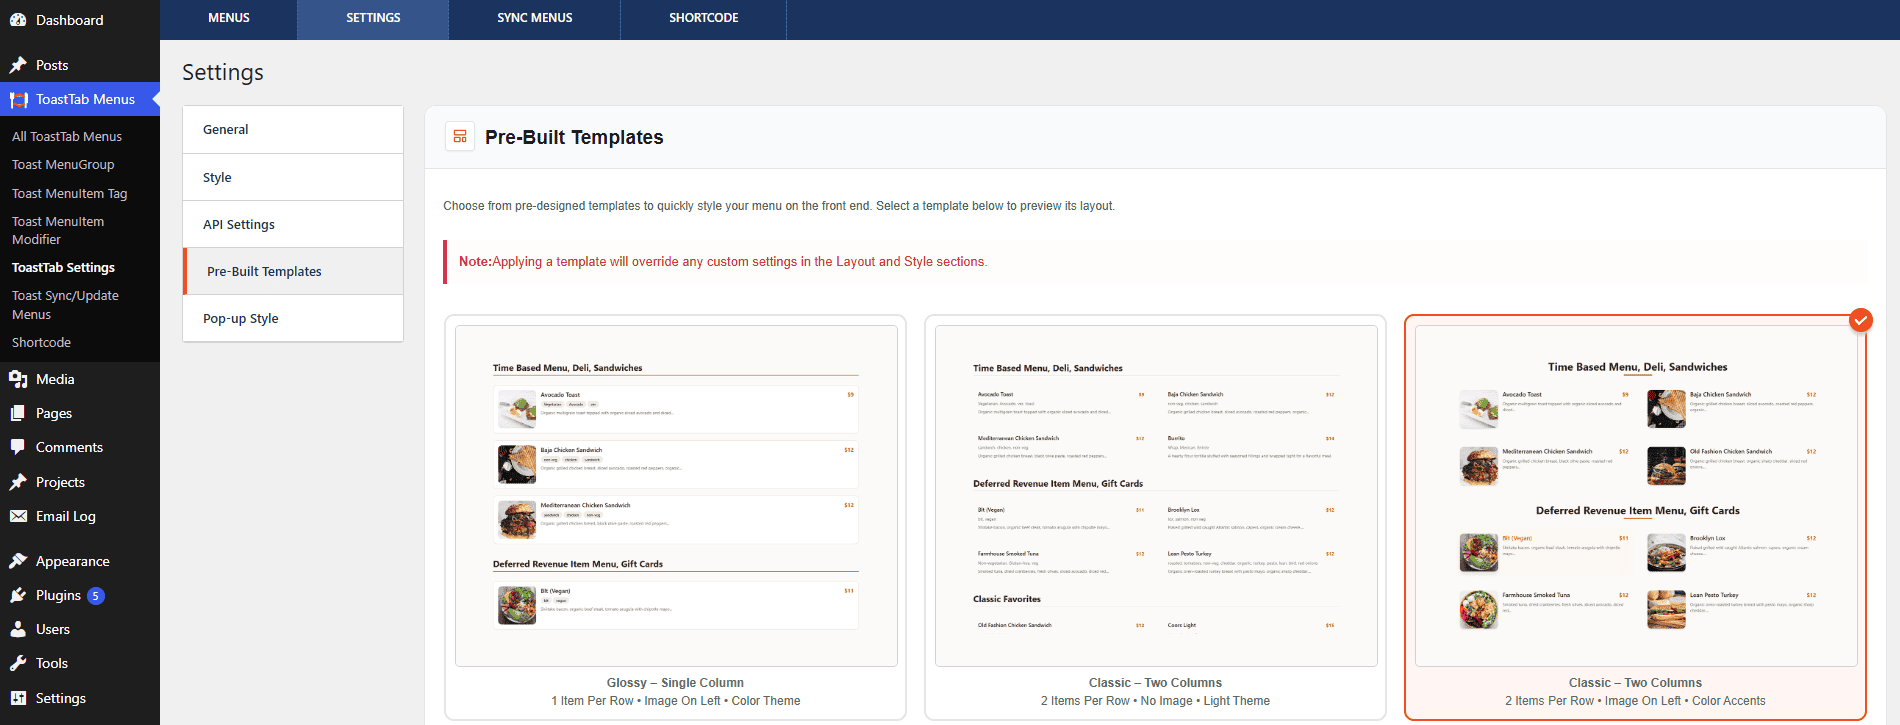
The Pre-Built Templates section allows you to quickly apply professionally designed layouts and styles to your menu with one click.
Select a Template
- Navigate to ToastTab Menu Dashboard → Settings → Pre-Built Templates.
- Browse the available menu templates.
- Click on a template to preview and select it.
- The selected template will be highlighted with a checkmark indicator.
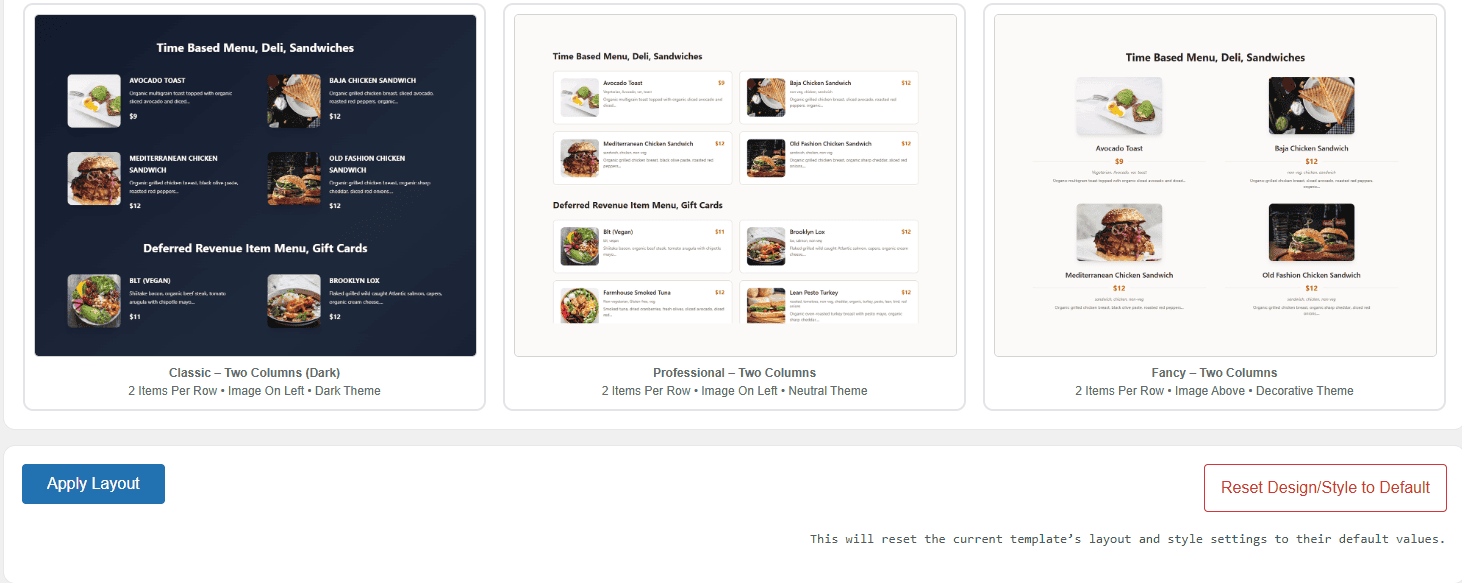
- Available template styles may include:
- Glossy – Single Column
- Classic – Two Columns
- Classic – Two Columns (Dark)
- Professional – Two Columns
- Fancy – Two Columns
Apply the Selected Template
- After selecting a template, click Apply Layout.
- The selected template design will be applied to your menu display.
Reset Design and Style Settings
If you want to remove the applied template and restore the default appearance, click Reset Design/Style to Default .
Save and Verify
After applying a template, review your menu on the frontend to ensure the selected design matches your requirements.
Configure Pop-up Style Settings
The Pop-up Style Settings section allows you to customize the appearance and behavior of the menu item pop-up window displayed on the frontend.
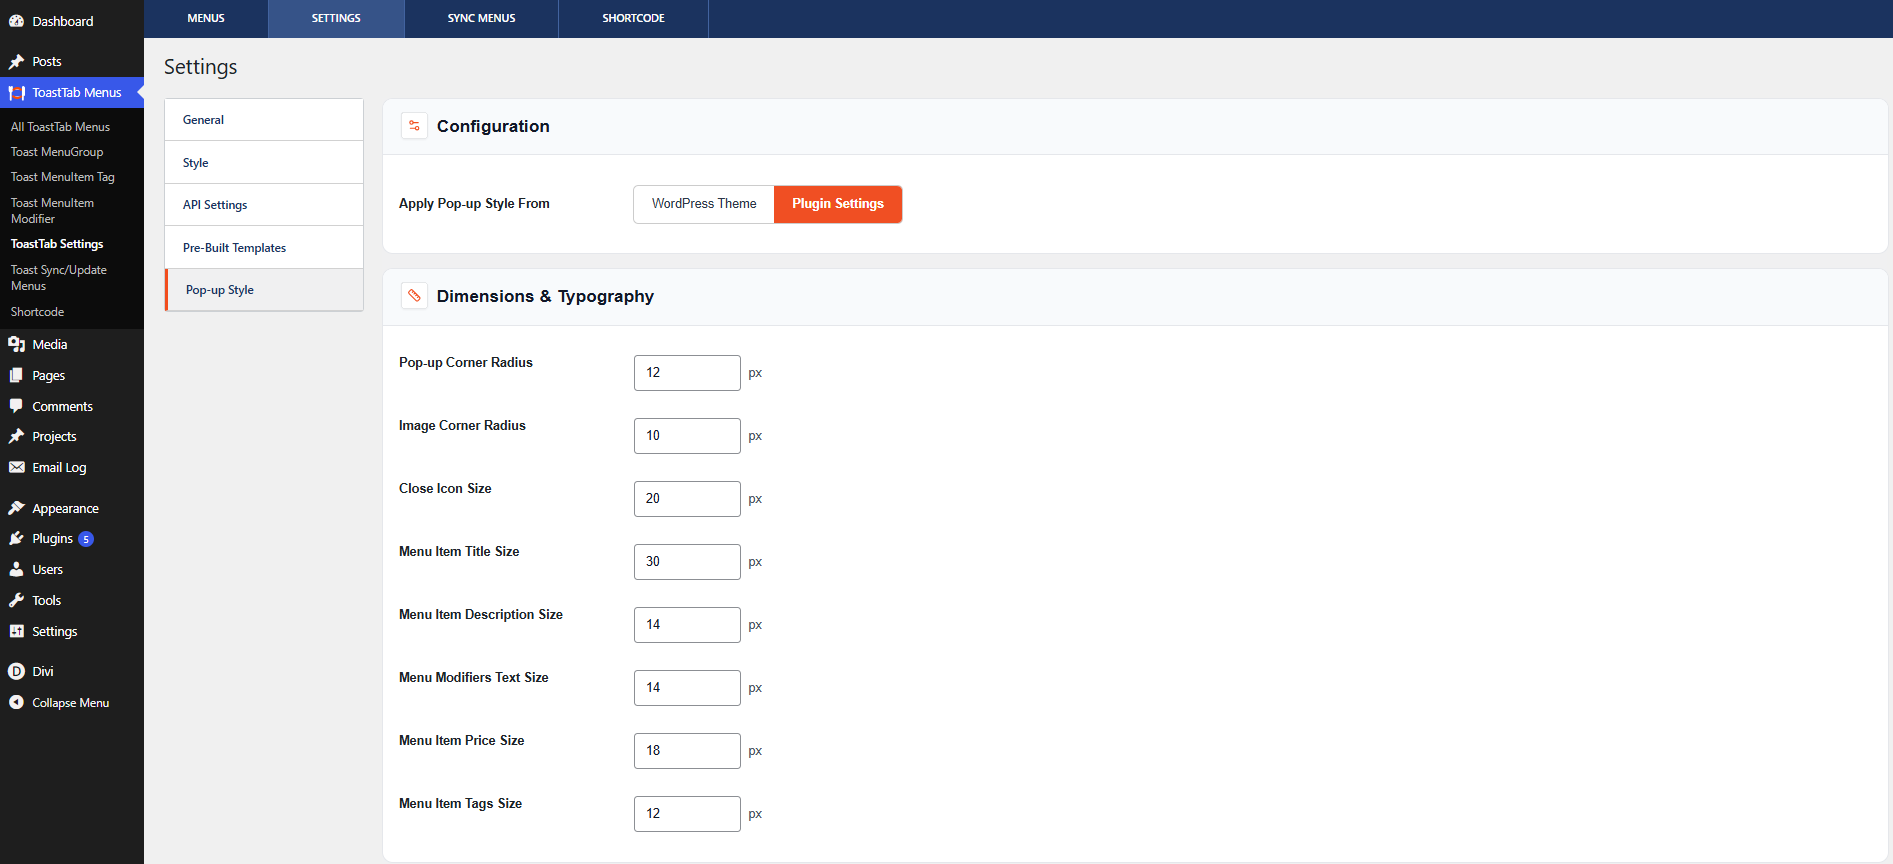
- WordPress Theme – Uses styles inherited from the active WordPress theme .
- Plugin Settings – Uses the custom pop-up styles configured within the plugin.
Dimensions & Typography
Customize the size and typography of the pop-up window. Available settings include:
- Pop-up Corner Radius
- Image Corner Radius
- Close Icon Size
- Menu Item Title Size
- Menu Item Description Size
- Menu Modifiers Text Size
- Menu Item Price Size
- Menu Item Tags Size
Enter the desired values in pixels (px).
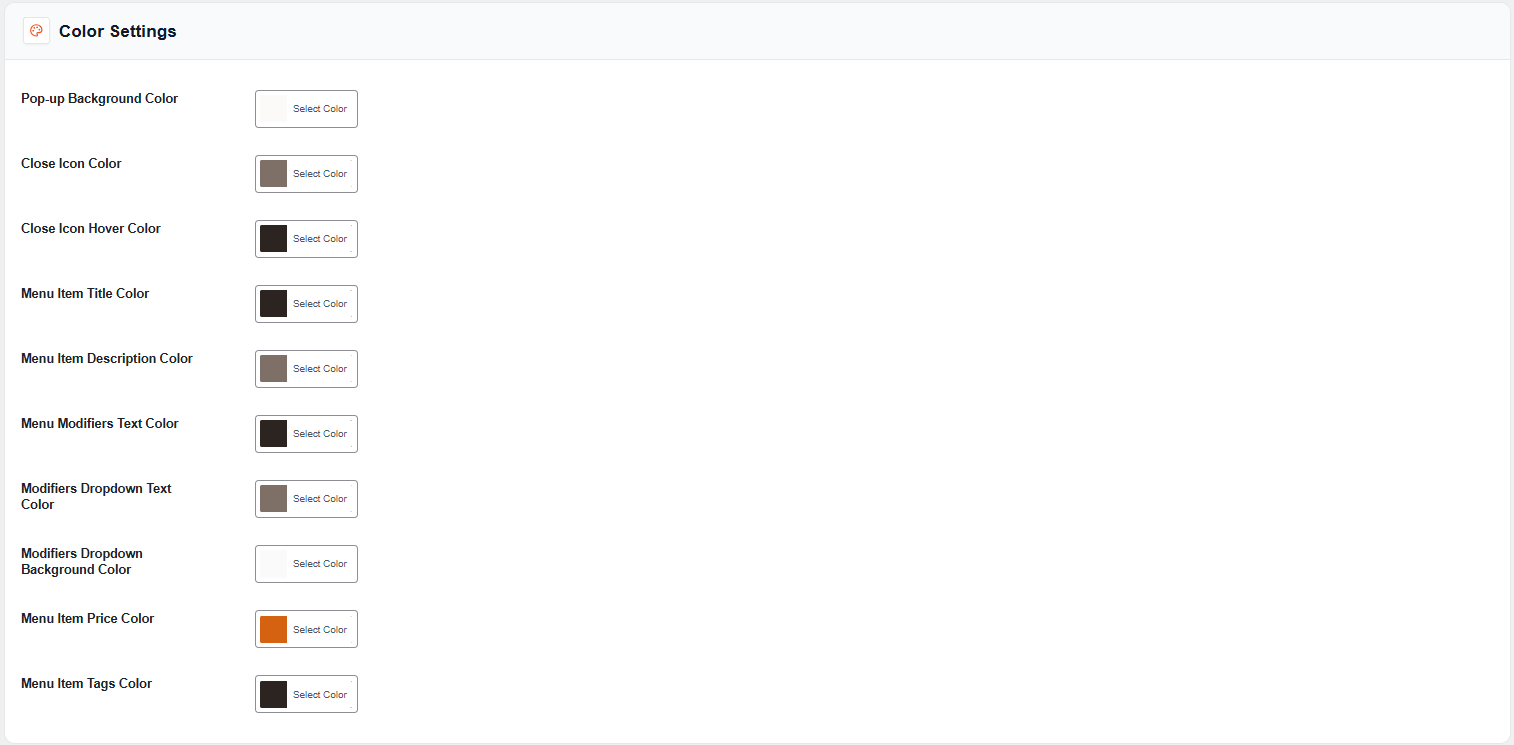
Color Settings
Customize the colors used within the pop-up window. Available color options include:
- Pop-up Background Color
- Close Icon Color
- Close Icon Hover Color
- Menu Item Title Color
- Menu Item Description Color
- Menu Modifiers Text Color
- Modifiers Dropdown Text Color
- Modifiers Dropdown Background Color
- Menu Item Price Color
- Menu Item Tags Color
Use the color picker beside each option to select your preferred colors.
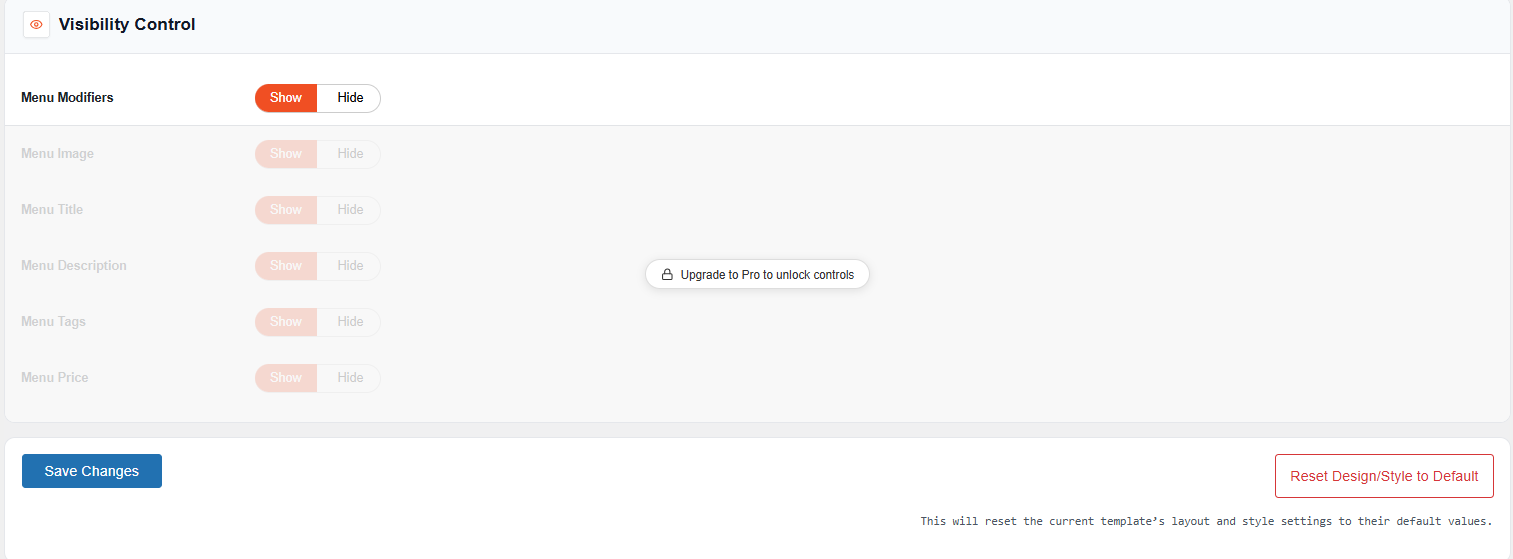
Visibility Control
Control which elements are displayed inside the menu item pop-up. Available options include:
- Menu Modifiers
Use the Show or Hide toggle to control visibility.
Save Settings
After configuring the desired options, click Save Changes to apply the settings.
Reset Design and Style Settings
To restore the pop-up styling to its default configuration, click Reset Design/Style to Default.